Peppers: A Hot Topic
- Upfront and Beautiful

- Apr 15, 2021
- 16 min read
Sweet or spicy, scalding or icy, these crunchy, juicy, edible, smooth and shiny orbs all come from one big happy family called Capsicum annuum. Still, many of us hesitate to grow them.

Yes indeed, peppers are fruits. Like tomatoes, these much-loved, often misunderstood exotics are not, botanically speaking, vegetables. They have serious street cred as veg though, so we'll leave it at that.
As a rule, as compared to more popular garden vegetables and fruits, peppers take a long time to mature. And that whole colour, heat and name change sequence that many peppers go through, is nothing if not confusing -- but just at first.
There are tens of thousands of varieties and cultivars of peppers (varieties being naturally occurring individual types, and cultivars being human-cultivated individual types), but really, there are only two overarching kinds/groups of peppers that North American gardeners and chefs concern themselves with generally. These are:
bell peppers, a.k.a. sweet peppers
chili peppers, a.k.a. hot peppers.
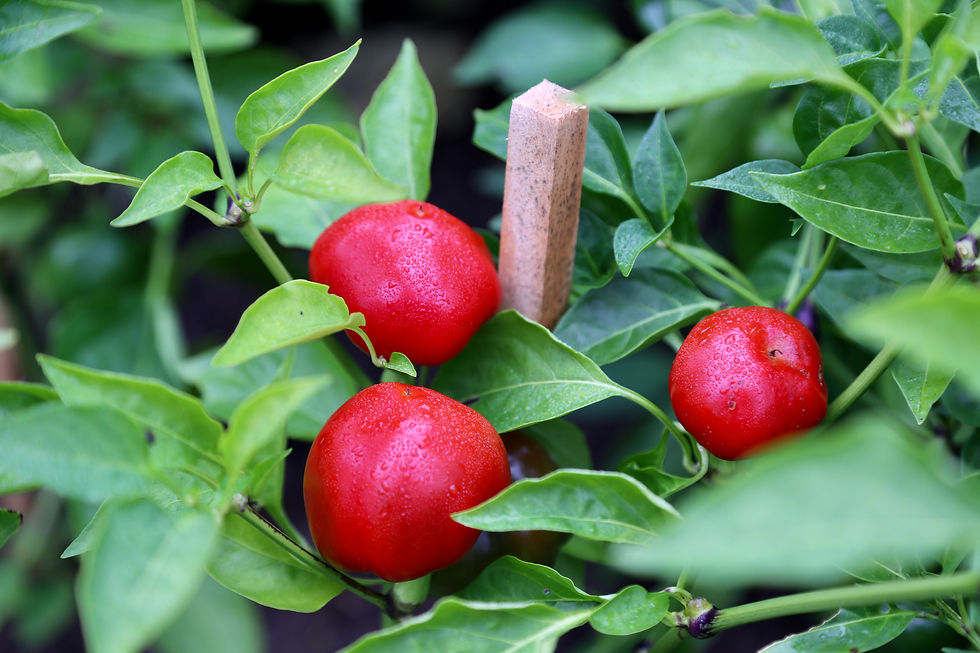
Bell/sweet peppers are those bulbous softball-size green, yellow, orange, red, white or purple peppers that are a mainstay of fajitas and stir fries, and also hold up well to stuffing densely with meat and cheese, before baking upright in the oven. Sweet bell peppers are what I think most of us would consider as 'quintessential' everyday cooking peppers.
Worth noting is that all colours of these peppers are the same pepper in fact, but at different stages of ripeness. That is, if I leave a green (somewhat bitter, not at all sweet) California Wonder bell pepper on its bush, it will eventually ripen into a super-sweet red California Wonder bell pepper. How cool is that? The newer white, purple, brown, even black bell peppers, are just hybrid versions of bell peppers, designed by plant breeders.
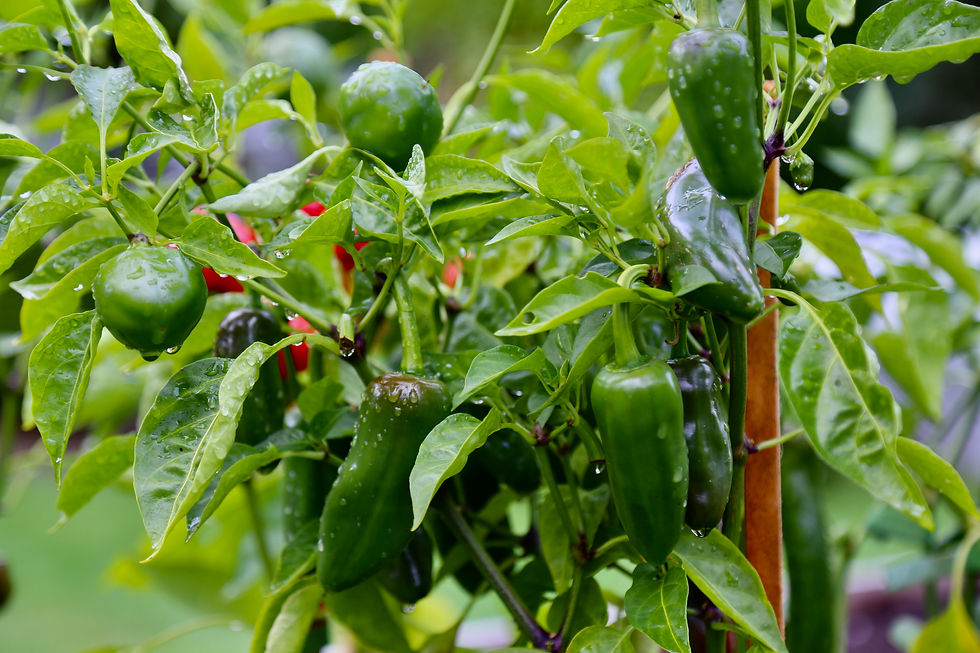
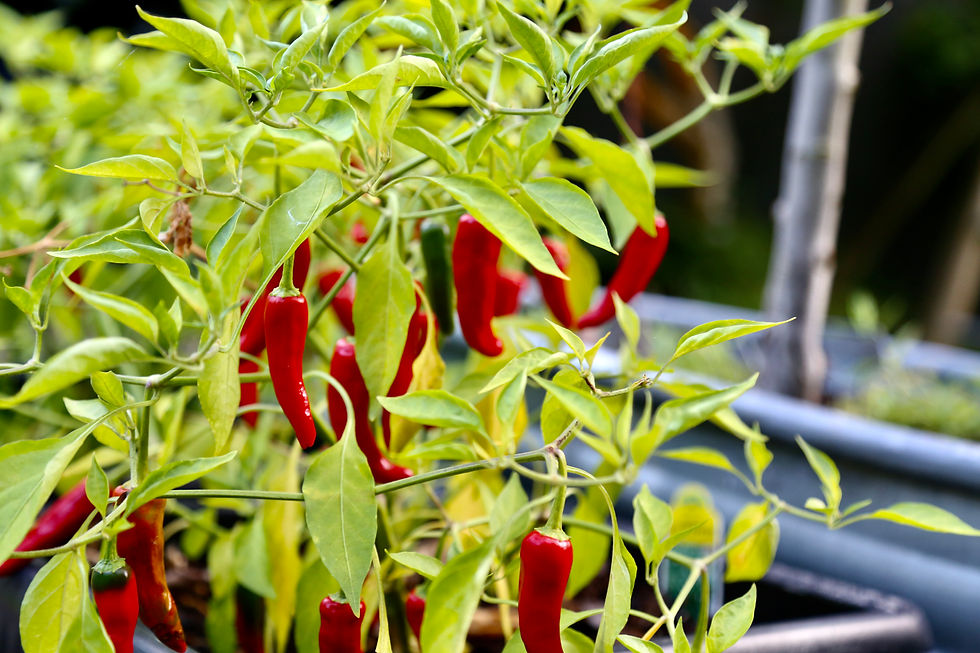
Chili/hot peppers are just that, but to varying degrees. Chili pepper heat is measured in units called Scoville Heat Units (SHUs), an imperfect estimation of how 'hot' pepper fruit is based on the concentration of irritant capsaicinoids, primarily capsaicin, contained within it (not in the flesh, but in the pith in the ribs and surrounding the seeds). Chili peppers are the exotic, mysterious, even dangerous peppers, often with deep ethnic roots.
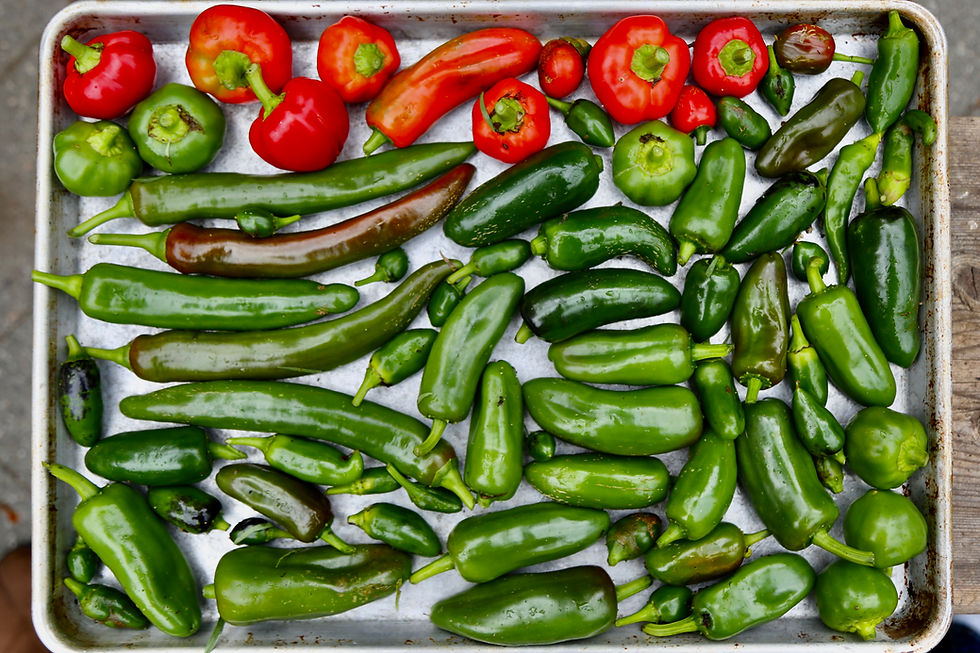
Chili peppers come in a wide variety of shapes and sizes, ranging from wee tiny, to very large, They range in heat levels (Scoville Heat Units) from just 100 SHUs in a banana pepper (pimento), to as high as 3,000,000 SHUs in Dragon's Breath peppers. The jalapeno peppers we all know and love, contain anywhere from 2,500 to 10,000 SHUs on average. Generally (but not as a rule), Jalapeno and other chili peppers grown in hot climates with limited rainfall will be hotter than those grown in milder climates with more rainfall. Keep that in mind when growing and managing peppers at home.
The world of peppers becomes confusing when pepper 'product' names become mixed up with pepper 'plant' names. We don't call sundried tomatoes by any other name, yet we call a dried and smoked ripe jalapeno pepper a 'chipotle' pepper, and we call a dried poblano pepper a 'mulato' or 'ancho' pepper.
Can one buy chipotle pepper or ancho pepper seeds? Not exactly; but one can buy jalapeno or poblano seeds (by these and other names) and then learn how to turn the peppers into whole chipotle or mulato/ancho peppers and/or chipotle or ancho powder. This same confusion applies to chili powder, Indian pepper, hot pepper powder, cajun pepper, Haitian pepper, paprikas, and many others -- all made from single or multiple varieties of dried sweet or hot chili peppers of varying degrees of ripeness, and sometimes, smoked, cured, or dried in the sun.
If you love peppers and wish to understand them better, it would be worth doing some reading up, some cooking, and also some growing. Nothing aids understanding better than watching homegrown peppers change shape and colour, and tasting/cooking them as they do.
As far as vegetables go, bell and chili peppers take a relatively long time to mature -- up to five times longer than a radish, for example. There are no exacts, but where I live in zone 7B, Pacific Northwest, bell peppers for example, should be started indoors 8-10 weeks before the estimated 'last frost of the year' date, and then they take another 60-90 days (9-13 weeks) to reach maturity. It is recommended to wait until two weeks after the last frost date, to plant peppers in the garden.
Peppers then, together with tomatoes and eggplants, are three popular 'slow to grow' exotics that experienced and fledgling gardeners alike will either start indoors, or purchase as garden-ready seedlings (small plants) from garden centres or green grocers. You can safely assume that purchased pepper seedlings are anywhere from four to six weeks old by the time you bring them home, and can take anywhere from two to four more months to yield.

If these numbers don't add up for you, don't worry, you are not alone. They never do, exactly, for anyone. Consider that seeds can take anywhere from four days to three weeks to germinate indoors, depending on the type, strength and source of artificial or natural overhead light they receive, the growing medium or soil they are planted in, ambient room temperature, and soil temperature (whether or not the seed tray is placed on a heat mat), so while seed packets and seedling information tags advise maturity date of 80-100 days from seed, or 70 days to maturity, all of that really depends on so many variables.
Don't let the numbers, recommendations, best-befores, and all of the rest of the often-times confusing advice prevent you from growing peppers. Remember, you are a better gardener than you know, even if you are new to it. Know too, that pepper seedlings will arrive to a garden centre near you at the time of year that can tolerate the weather in your particular plant hardiness zone. A quick online search for 'plant hardiness zones north america map' will direct you to good information about your particular area.
If you follow the instructions on the planting tag, you should be growing peppers like a pro in no time. If you take note of the date when your peppers are ready to harvest, you can work backwards eight to 10 weeks from that date next year, and sow your own seeds indoors.
Peppers are native to hot climates in southern North America, and northern South America, so quite naturally they like sun, heat, and nice warm feet (roots). Thinking like a pepper will help you do the right thing by them; that is, follow your intuition.
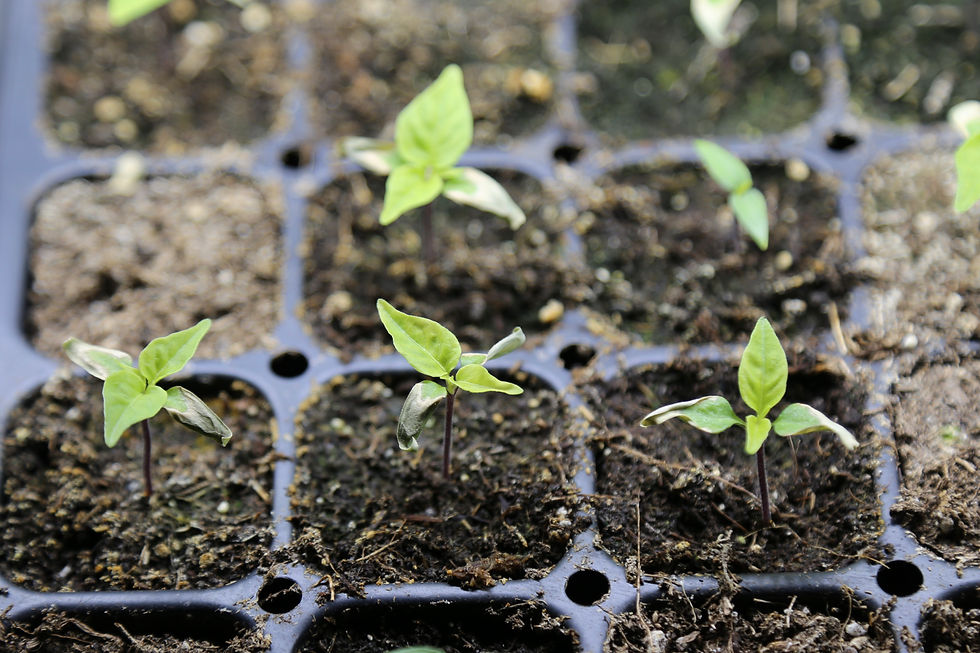
I planted several varieties of bell and chili pepper seeds indoors eight weeks ago, on February 14th, and some just two weeks ago. I will be moving the larger and sturdier plants outside under cover in two weeks, and following suit with the rest as the weather and soil grow warmer. Some of the older plants are starting to flower already, plus I can tell they are tired of sitting under LED grow lights in my home office by night, watching me work by day.
I planted my seeds in a home-blended non-sterile growing medium amended with organic compost and worm castings (poop). Unless however, you are absolutely confident in the quality of your non-sterile medium or organic compost, it is not recommended to grow seeds indoors in anything but a sterile growing medium. Sterile seed starting mediums are widely available at garden centres, chain hardware stores, even grocery stores, early in the gardening season, and are typically sold in six or nine quart/litre bags.
I would never start seeds indoors in standard garden soil or in any less than stellar quality compost or combination thereof, simply because soil-borne pathogens and fungal spores can cause problems, inhibit germination, or kill plants. If you choose to use a sterile seed starting mix, I hope you choose one without peat moss. Most commercially available peat moss comes from endangered peat bogs, many in Canada. Peat bog and peat lands store up to one-third of the world's soil sequestered carbon, and harvesting the peat for soil-less mixtures not only releases stored carbon into the atmosphere, it destroys critical ecosystems.
Coco coir or 'coco peat', is a coconut pith byproduct and excellent peat moss alternative Coir is sometimes raked up along saltwater beaches, so if your starter mix contains coir, give the mix a quick rinse through with clean water to remove the salt, before planting your seeds.
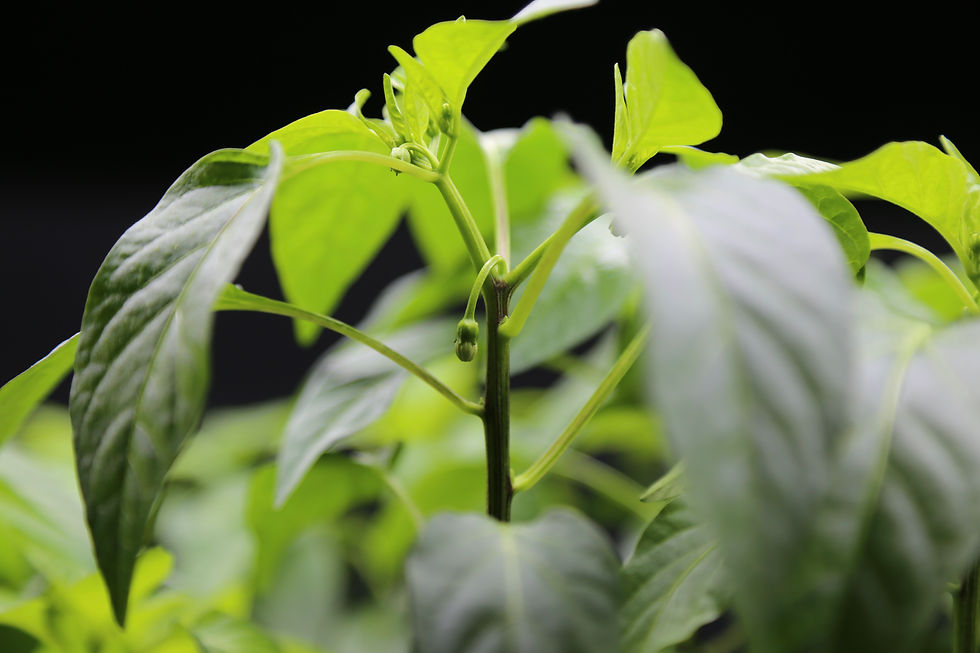
Bell and chili peppers have been much easier to grow from seed than tomatoes. In my experience, they are less prone to disease, are less sensitive to changes in temperature and light, and require less water. After about six weeks, they morph into little tree-like soldiers, and their beautiful leaves become thicker, lightly waxy, and somewhat glossy -- like those you might brush up against in a tropical rainforest.
I did not fertilize my peppers with any store-bought product. The worm castings and beneficial biology in the organic compost delivered all the goodness the seeds and seedlings needed. I planted seeds, evenly spaced, 4-6 seeds per individual 4" seed cells (or one seed per 1.5" seed cell), then transplanted them into individual 3" pots after they had developed three sets of leaves (one set of seed leaves plus two sets of true leaves). I am just now transplanting them into 4" or 6"pots, depending on their variety, root set, and size.
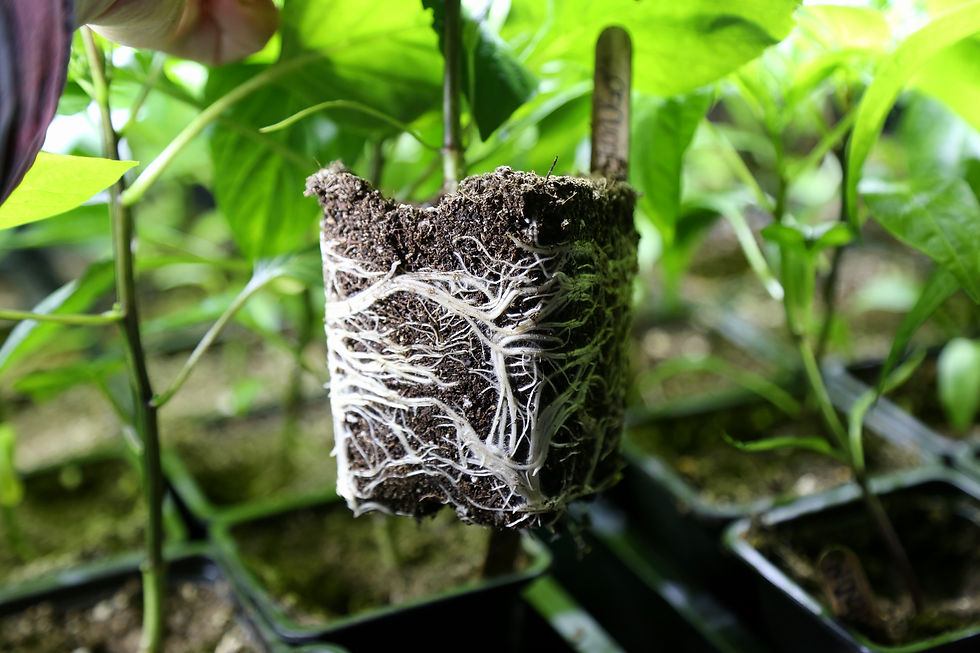
Like tomatoes, peppers will let you know when they need more space. The soil or planting medium will dry out quicker than usual, and the roots will have populated the pots considerably as they search for more space and nutrients. To check the roots of a potted seedling, simply massage the sides of the pot gently, to loosen contents, tip the pot sideways and lift the stalk gently at the base. If you see a loose mass of healthy, bright white roots, it is time to 'pot on', as they say (or 'pot up', or transplant). When in doubt, pot on earlier than later, to avoid plant stress.
And also like tomatoes, Capsicums are generally self-pollinating which means that flowers each have the requisite female and male equipment on board, to turn blossoms into pepper babies, and under most circumstances can do so without relying on bees and other pollinators to do the deed.

Typically, the natural movement of air caused by wind, animals, insects and people moving in and around where pepper plants grow outdoors, will facilitate pollination and subsequent setting of fruit. One should then, ideally, move pepper seedlings outdoors, protected if necessary, before they flower or shortly thereafter.
Growing Peppers from Seed
Depending on where in North America you live, and also on which variety of bell or chili pepper you wish to grow, there is still time to grow from seed. The much-loved jalapeno pepper can mature in 60 days under good conditions, and jalapeno seeds are widely available.
Start jalapeno seeds in a purpose-built seed starting tray or in a domed plastic take-out food container.
The growing medium should be moist but not wet, and kept that way until plants move out into the garden - think moist chocolate cake and you will have no problems.
Plant seeds according to seed package directions, or about 1/4" deep, spaced a few inches apart, ideally.
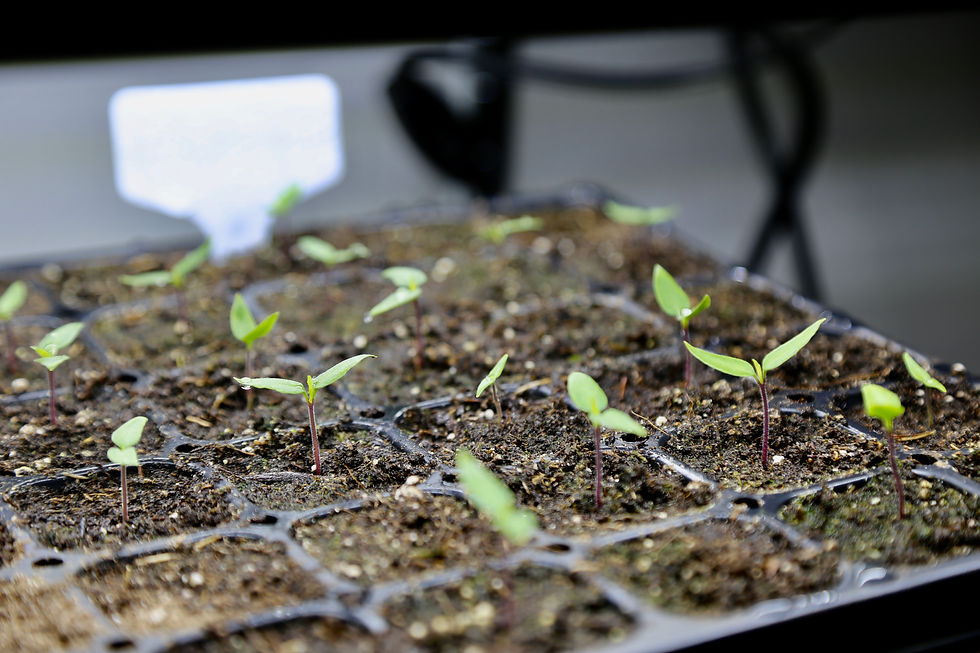
Cover with a plastic dome, plastic wrap, or lid of some kind until the seeds start to germinate (sprout), and set the tray or container on top of the fridge, on a sunny windowsill, or in another warm (not hot) spot - 75F-85F is ideal. A heat mat helps but is not necessary. Do not replace the dome, lid or wrap after germination.
Sprouted seeds will need about 16 hours of artificial light per day for optimal health. You have no control over the amount of natural light available on a windowsill, but do know that it must be sunny (full or part south facing), and that a north facing window will not provide enough warmth or sun.
If using grow lights, keep them about 4-6" above the pepper babies. Intense light can scald pepper leaves, especially when they are tiny, and/or if the source of light is warm/hot, unlike cool LED light.
Pot on when plants develop three sets of leaves, and then as needed two or three more times (as described above) before starting to move them outside.
Harden plants off - that is, get them used to natural sunlight and outdoor temperatures, by setting them outside for a bit of time each day, for a week or so. I am a bit hard on my tomato and pepper plants and don't baby them much at all during the move. I am in zone 7B on the 49th parallel, so perhaps intense sun isn't such a threat where I live.
Plan your final move outside based on in-ground or in-container planting, two weeks after the estimated last frost date, or thereabouts.
Bell and chili peppers love sun on their faces and nice warm feet, so I try to plant them strategically or in pots on casters that can follow the sun when need be, and late in the season.
I plant in soil comprised of 100% organic compost and amended with worm castings (rate of 5:1 in containers), but you can plant in good quality garden soil amended with chicken or rabbit manure, plus worm castings. Be sure to plant in a wide hole, two to three times as wide as the root ball, to allow for root expansion. Water well to fix and settle soil around the roots.
Some gardeners swear by the addition of epsom salts, ground eggshells, fish emulsion or kelp as soil amendments around their pepper plants. I haven't tried any of that, though I have added compost tea on occasion.
Straw or other clean and dry mulch is recommended, but be sure to keep the main stem free from contact.
Water deeply and regularly (not frequently), and avoid letting plants dry out.
I am not a bell and chili pepper expert by any means, but I have had great success for many years growing many varieties of peppers. I had some troubles last year when we had a wet spell late in the summer, and smoke from wildfires obliterated the sun considerably for several weeks. The hot cherry peppers that were planted at the south end of a raised bed developed a slight blight from some combination of cold, damp and too little sunshine. I will not repeat that strategy this year, but instead stick to planters as much as possible.
My 2021 pepper menu includes: (D2M = days to maturity SHU = Scoville Heat Units)
California Wonder sweet bell - light green to red. D2M: 65-75 SHU: <100
Twingo sweet bell - bright green to bright yellow. D2M: 60-65 SHU: <100
Jalapeno M chili - green to red. D2M: 70 SHU: 2,500-10,000
Spicy Slice chili - green to red. D2M: 65 SHU: 4,000-6,000
Sureno Serrano chili - green to red. D2M: 70 SHU: 10,000-23,000
Arapaho chili - red. D2M: 65-75 SHU: 30,000-50,000
Habanada chili - orange to red (heatless habanero hybrid). D2M: 100 SHU: <100
I know from experience that there will be huge variations in sweetness and heat among peppers, even ones from the same plant. I think this is charming and part of the fun of growing peppers. I am particularly looking forward to the Habandas, a hybrid 'heatless' habanero developed by Michael Mazourek at Cornell University, available through the Row 7 Seed Company. Given that these particular seeds arrived late in the mail, and I started them indoors just two weeks ago, I expect to have to bring the fruit to maturity in the fall in the greenhouse, or perhaps inside the house under lights.
Just yesterday, inspired to get up close and personal with some roasted red bell peppers, I created a super-quick, two-in-one recipe that I promise will get you hooked, if you aren't already. Learning how to roast and puree red peppers is a lifeskill in my house, a fundamental tool in making beautifully plated and presented restaurant quality food from basic home-grown ingredients, plus on-hand pantry spices and garnishes of choice. This recipe title sounds super fancy, but the doing of it is super easy and fast!
Roasted Red Pepper and Confit Garlic Soup
Ingredients
Sweet red bell peppers - perhaps 1.5 per person
1/4 cup olive oil
Garlic cloves, peeled and sliced - 1 clove per person
Vegetable or chicken broth, low sodium (home made or tetra pack)
Salt and pepper
Ground cumin or other favourite pantry spice
Methodology
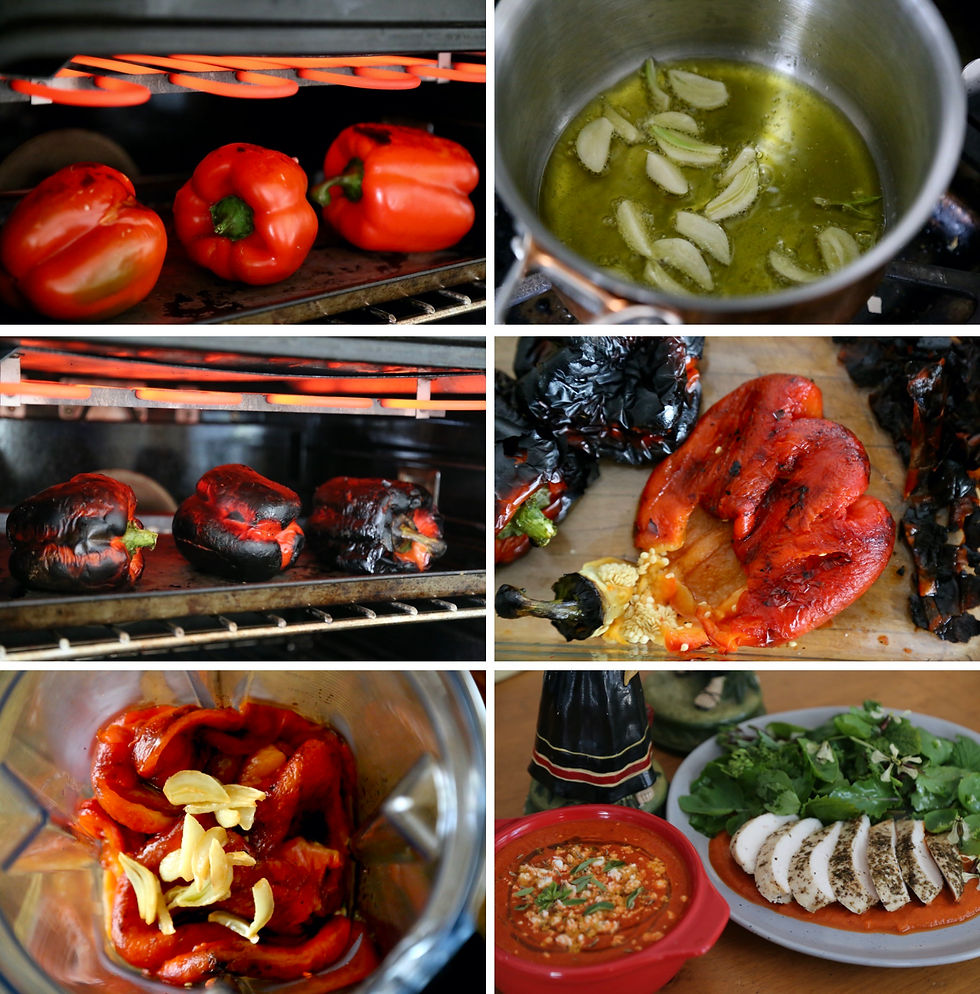
Lay whole clean and dry peppers on a sheetpan, and place them a few inches below the broiler on high, in the oven. Check on them every few minutes as they blister and the skin turns black, using a pair of tongs or a long-handled fork to turn them until all sides and the top and bottom are blackened. Trim the stems so that they can stand on their heads and burn their bums.
Meanwhile, set the sliced garlic into the olive oil in a small saucepan, and turn the heat to medium high. Once the garlic starts to sizzle, turn the heat to ultra low and let simmer for a few minutes until barely golden at the edges. Turn the heat off and leave to cool.
Once the peppers are done, turn off the oven and place the charred peppers in a glass or steel bowl or pot, and cover it with a lid or wrap so that it steams and loosens the skin.
When the peppers are cool enough to handle, scrape the blackened bits off with a knife (need not be perfect), and remove the stem and seeds. Place the peppers in a blender, add the garlic slices (leave the garlic-scented oil behind) and a pinch each of salt and pepper, and puree until smooth.
Remove 1/2 cup or so of the puree from the blender and set aside.
Add broth, 1/2 cup at a time to the puree left in the blender, until the consistency of creamy soup or as you like it. Add a pinch or two of cumin or other spice of your choice and blend to incorporate. Adjust seasoning if needed (salt and pepper), transfer to a saucepan to re-heat, or refrigerate or freeze for later use.
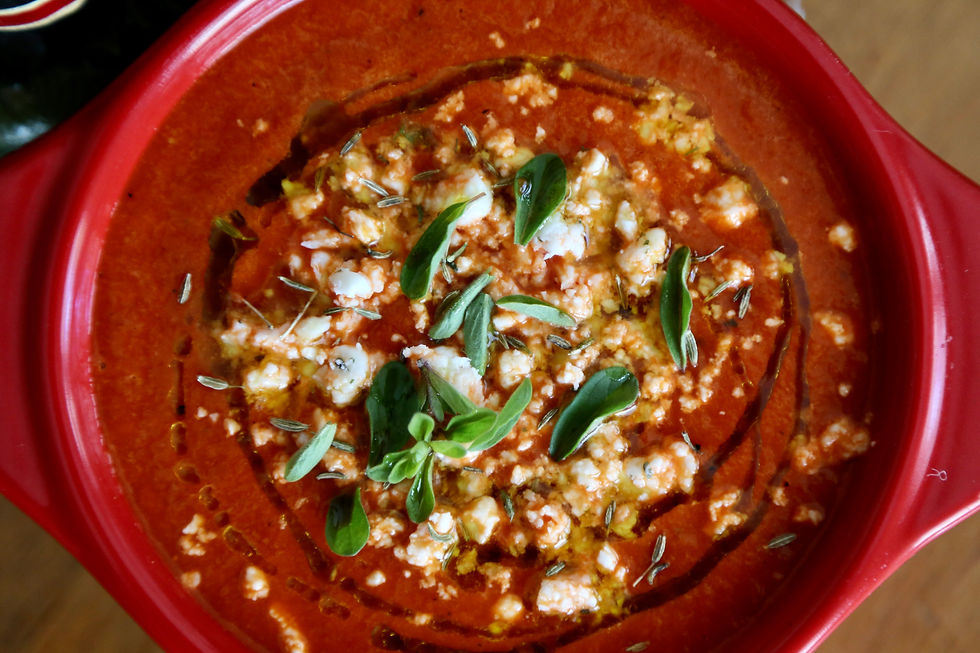
To serve the soup, simply heat and pour into heated bowls. Garnish with a bit of olive oil and whatever fresh herbs of trimmed veg greens you have handy. I had some feta that I crumbled on top, and then added a few sweet marjoram leaves from a patio pot. A squeeze of lime juice, or even lemon would finish the softly-smoked, cumin-scented soup beautifully. I will try that next time.
The reserved undiluted puree was simply spread across serving plates with the back of a spoon. I sliced some cold, left-over chicken breasts and laid them out like fans on the puree (beef, pork, roast veggies would work well also). Some winter greens from the garden, plus beautiful flowers from the arugula gone to seed, made for a lovely spring side salad. My recipe tester husband had the hot soup and the cold chicken salad for lunch, and he loved them both. I'm sure you will love them too. If you make the soup and/or the puree, please let me know.
And don't forget the gorgeous garlic oil that we set aside to cool. At the Italian market near where I live, garlic-infused olive oil sells for $27 per 750ml. This oil is better by far. Use it to drizzle on eggs, pasta, soup, in popcorn, to saute veg or fish, the possibilities are endless. It will keep for several weeks in the fridge, but it won't last that long.
Other ways to enjoy homegrown bell and chili peppers:
Fresh, right out of the garden. Best enjoyed still warm from the sun.
Sliced thinly into a gorgeous garden salad.
Chopped roughly along with onion and cucumber, then sprinkled with fresh or dried Greek Oregano, as part of a Greek Salad.
Sliced and sauteed in olive oil, along with sliced onions and chopped garlic, and used as a base filler for fajitas, quesadillas, tortillas, frittata, shakshuka, etc. I make a bulk batch and freeze it in 8-oz containers.
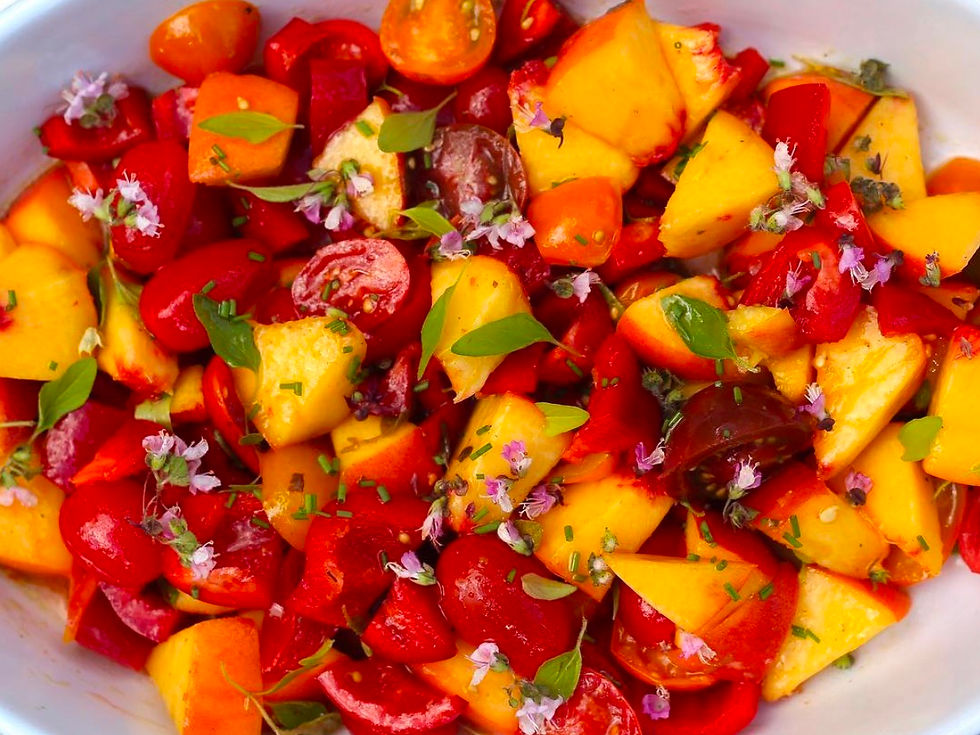
Chop seeded sweet red bell peppers and sweet peaches or nectarines into 3/4" squares and toss together with halved super-sweet cherry tomatoes. Dress lightly in honey-lemon vinaigrette, and serve as part of a summer buffet.
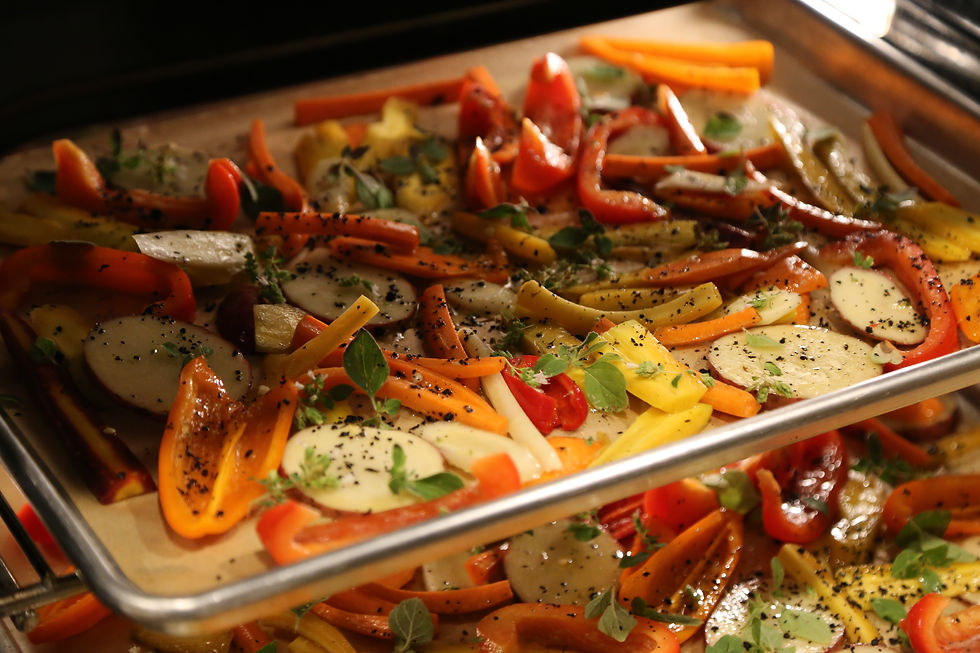
Oven dried. Cut peppers in half or quarters and remove seeds. Toss in confit garlic oil (or regular olive oil), and a pinch each of sea salt and red pepper flakes. Spread on a parchment lined baking sheet and dry slowly in a 275-300F oven until almost dehydrated but still somewhat squishy and soft. Cool and refrigerate for use on sandwiches or to serve as a room temperature side. Or freeze in 8-oz containers. Use throughout the year, whole or diced in pasta sauces, bruschetta, on pizza, on fresh bread, etc.
Wash dry, seed, chop or dice peppers and freeze in airtight containers, for later use in soups, sauces, just about anything cooked that you would use fresh peppers for. Toss a handful of frozen pepper bits in a few tablespoons of olive oil, with a clove of garlic (minced), and chopped fresh herbs to taste, over low heat in a saute pan. Cook through until 'melted' and toss into fresh hot or cold pasta noodles.
Chop or slice, remove seeds and saute in olive oil, along with some garlic, until just soft, then cool slightly and puree in a blender (place towel on blender lid to prevent hot liquid from escaping). Use the puree as-is under grilled meat or vegetables, or add vegetable stock and serve as a hot or cold soup. Garnish with crumbled feta or other cheese plus chopped fresh herbs.

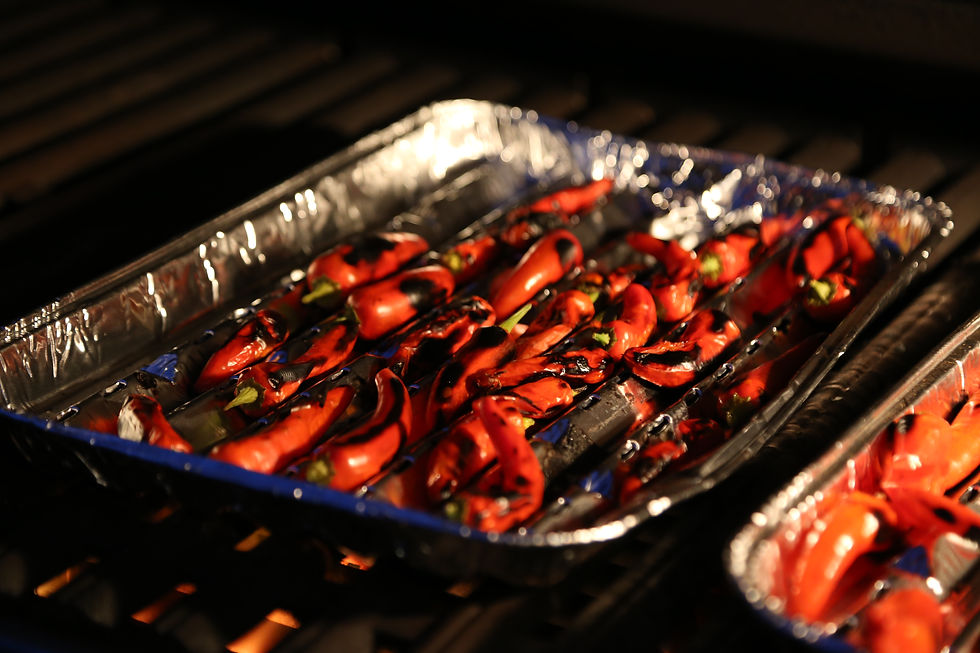
Place whole bell peppers or chili peppers on a sheet pan under the broiler, until the skin blisters and turns black - rotating to expose all sides and both ends. Remove to a sealed plastic bag or glass container and let steam for a few minutes until you can peel off the blackened skin and remove the seeds and core. Puree with a few roast or confit garlic cloves and use as-is or make soup as above. Do this with yellow, orange or red peppers, or any combination thereof, for a sweeter mixture. Mix the puree 50/50 with tomato puree, for a gorgeous sweet and savoury past sauce. Use green peppers for a more herbaceous mixture. You can blacken peppers over an open flame also, on a barbeque or gas grill, using tongs to turn. At the end of the growing season when you have a surplus of peppers, roasting and peeling them to freeze in 8-oz containers is a great idea. The frozen roasted peppers, home-canned canned tomatoes, and frozen oven-dried tomatoes (see Tomato Tips and Tricks) make an appearance in my kitchen at least twice a week during the winter.
Make ice cream. Combine two roasted and peeled orange or red peppers with one small roasted red or golden beet, in a blender with honey to taste and the juice of one-half lemon. Puree until very smooth. Add simple syrup to thin if desired (50/50 sugar water, heated to dissolve), then freeze in an ice cream maker. Serve garnished with fresh mint.
Dry clean whole or split peppers for use later in the season. Run a string or thread through the stems and hand the peppers, with a bit of air space between them, in a warm dry location until dehydrated. Store as-is or ground, in an airtight jar. You can also use a food dehydrator, or the oven set on low. Remember where the heat lives though, so remove pith and seeds before drying, if desired. Maybe even make your own chili powder or mixed spice blend.
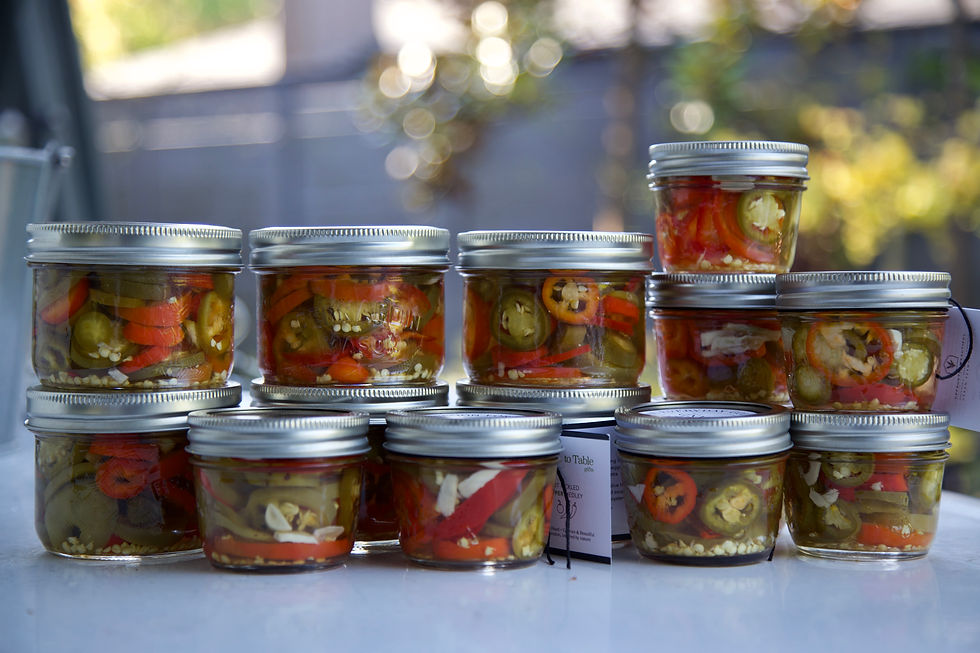
Seed and slice small hot chili peppers such as jalapenos, then pickle them together with whole small garlic cloves, in a hot brine of 3 parts white vinegar to one part water plus salt (one tablespoon per quart of brine), Hot water process them in sterilized half or quarter pint jars for five minutes.
To reduce the heat when eating or cooking peppers, remove the seeds, membrane and ribs. Wear rubber gloves when handling, and never touch your eyes or lips before washing your hands.
So that's it for this week for me. I hope we have taken some of the mystery out of growing and preparing peppers, and I hope you are encouraged. If you need help, just ask.

Happy growing!
To learn about urban permaculture and permaculture principles, watch Modern Farmer Magazine's Urban Permaculture video series in which publisher Frank Giustra and I introduce the basics.
If you haven't subscribed to MF's Million Gardens Movement newsletter, please do.


Comments